Max Makes

Charles Woodpecker Amigurumi

Cute, eh!

To help with my isolation woes, I bought the most amazing crochet book I have ever owned, I meant it – it’s amazing! Normally I flick through and see a couple of things I like and want to try but with this book I want to make everything! It’s called Animal Friends of Pica Pau and it is brilliant. The characters are very cute and the colour palette is 100% my cup of tea. It’s also given me lots of ideas for new shapes etc so maybe I can finally design something of my own!

I would recommend this book for crocheters at an intermediate level. The patterns are fairly straight forward but there are some techniques that you need that are a bit more complicated.

Colour blocking

When you’re changing colour (not horizontal stripes) and working in the round, you’ll find that after a couple of rows, you’re stitching doesn’t exactly match up. This is because every time you start a new round, the first stitch is slightly more back than the previous rows first stitch. To combat this, every 2-3 rows you can move your stitch marker, which is the starting point for your row, one stitch forward. Then continue with the pattern as normal. It’s not going to give you a perfectly straight line but you will see an improvement.

To make sure your stripes are in line or ‘jogless’ I use this really handy tutorial (method #2) and as you go along, for this particular pattern, tie your ends together after each row and snip the ends. This will stop them getting tangled when you’re changing colours.

Another thing that I do is to save all my snipped ends and mix them with the stuffing at the end. This saves mess and means you have to use less stuffing. It’s only really applicable to amigurumi made with 3mm or less hook, otherwise the gaps between two stitches are too wide and you’ll see the yarn ends.

As usual, this woodpecker will be on sale in my ebay shop, along with the other amigrumi that I’ve made. I usually only make one of each item and I’m not taking commissions at the moment.

Happy hooking!

Max Makes

Sleepy Bear Amigurumi

Look at this adorable sleepy bear! You can get the free pattern here. The instructions were easy to follow and would be suitable for a beginner who has had some experience of making amigurumi. I used a 2mm hook and DK yarn but you can use a 3 or 3.5mm if you want, the bear will just be bigger. Getting the stripes to be lined up properly or ‘jogless’ can be a total pain in the butt but I found this great tutorial, I used method 2 but have a go at both and see what you like best.

All my handmade amigurumi, including this bear is for sale on ebay.

Max Makes

Cat With Dungarees Amigurumi

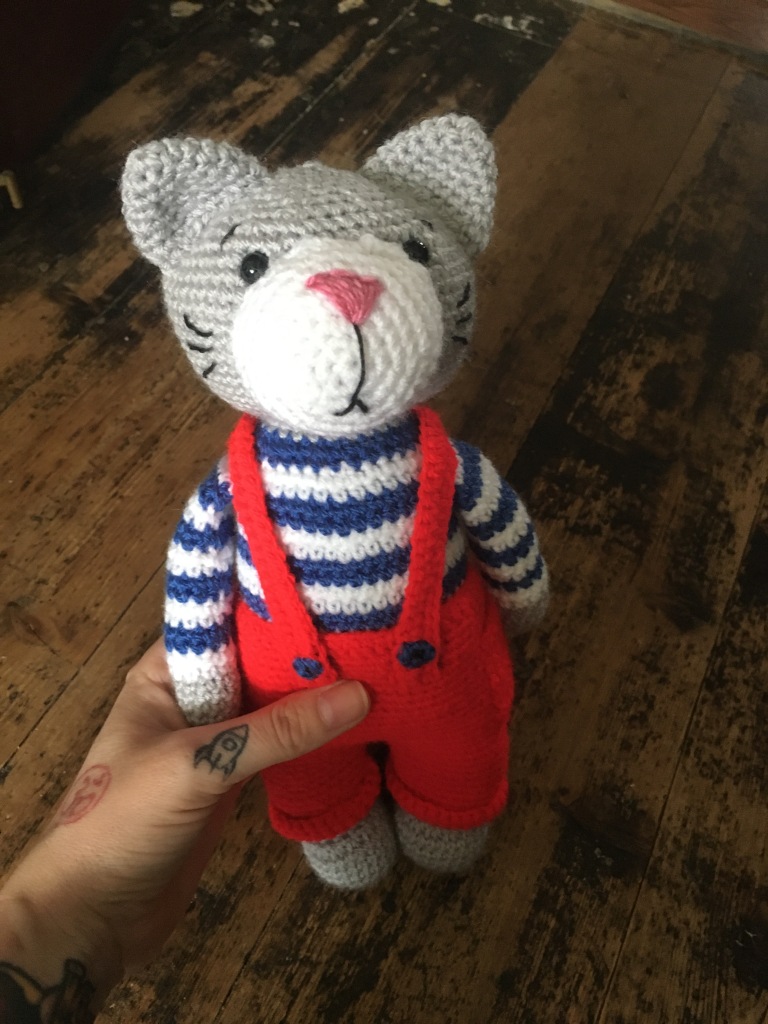
I decided to make this free pattern that I found on Pinterest. It had been translated into English but not very well! I think this pattern would be best for someone with previous experience of making amigurumi and some of the directions were a bit….. weird.

I used a 3mm hook for the body and a 2mm for the dungarees together with Stylecraft Special DK yarn. Whatever hook size you use for the body, make sure you use a smaller one for the clothes or they won’t fit properly. I didn’t have any tiny buttons so I separated some yarn into strands and used that to do a rough satin stitch to look like a button. Another thing I changed was I added 2 rounds of single crochet onto the muzzle, because I felt it wasn’t deep enough to give a good shape. Oh! I didn’t make the hat either, I didn’t really like it but if you’re going to do it, make sure you use the smaller hook again.

Anyway here he is – Bill The Cat (formerly known as Jeremy) I have listed Bill for sale on Ebay 😀

Max Makes

Snoopy and Woodstock Amigurumi

I love to make amigurumi! Anything cute with a face – I’m in! Here’s what I’ve just finished.

Cute, eh?! You can get the pattern for Snoopy here and the pattern for Woodstock here. Snoopy was really easy to make but I found Woodstock very fiddly when trying to sew all the pieces together. Not sure what to make next… any suggestions?